Creating bucket using gsutil
Let us see how to create the bucket using command-line utility as we already know how to create the bucket using the web console. Please refer to this link to have look at the bucket creation through web console if you not covered the previous post.
Set the project if not already configured.
gcloud config set project <project-id>
gsutil mb -c nearline -l asia gs://datacloudies-bkt-gsutil
mb stands for make bucket
-c class type
-l location
-p project ID. If the project ID field is skipped, it chooses the default project.
gsutil ls - will list down the created bucket.

Changing the storage class of the existing bucket
Well, Next we will see how to change the storage class of the existing bucket. The below essential directives are very important to keep in mind, and also the changes will only affect the new objects in the bucket. Existing objects would still use the older class type.
Multi-Regional buckets can not be changed to Regional and vice versa.
Coldline buckets can be changed to Regional or Multi-Regional.
Nearline buckets can be changed to Regional or Multi-Regional
Coldline buckets can be changed to Nearline and vice versa.
Changing the class through the web console
Go to the selected bucket, select the default storage class from the Edit bucket. Change the storage class to the desired type and save the changes.

Changing the class through command-line
Let us change the standard class to nearline for the below object,
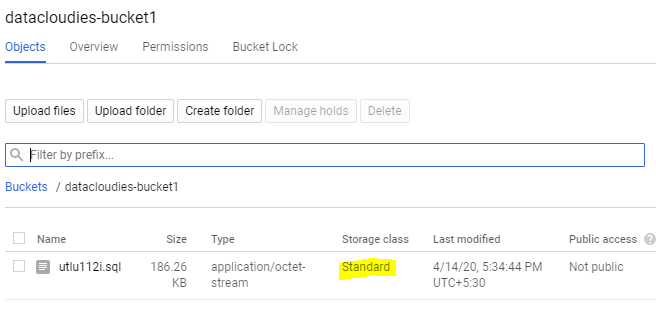
gsutil rewrite -s nearline gs://datacloudies-bucket1/utlu112i.sql

Verify the changes in the console
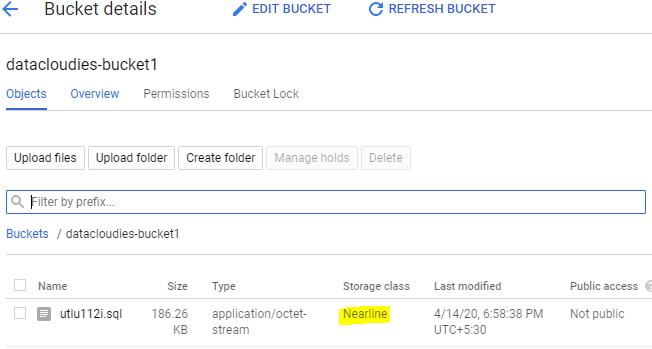
That is it. We have successfully changed the class type in the GCS bucket. Let us move on to the next posts for learning more services.